
Notice
Recent Posts
Recent Comments
Link
| 일 | 월 | 화 | 수 | 목 | 금 | 토 |
|---|---|---|---|---|---|---|
| 1 | 2 | 3 | 4 | 5 | 6 | 7 |
| 8 | 9 | 10 | 11 | 12 | 13 | 14 |
| 15 | 16 | 17 | 18 | 19 | 20 | 21 |
| 22 | 23 | 24 | 25 | 26 | 27 | 28 |
| 29 | 30 |
Tags
- graphql
- 신촌 소문난집
- 금별맥주
- promise처리
- 운정 소바동
- graphql with reactnative
- 화이트해커를 위한 웹 해킹의 기술
- 앙버터마카롱
- apolloclient
- graphql mutation error
- graphql with RN
- 도그존
- typescript
- 지보싶 신촌점
- 토라비
- useMutation error
- graphql react native
- 홍대 토라비
- 화이트 해커를 위한 웹 해킹의 기술
- graphql 400
- 비동기배열
- 예쁜술집 예술
- 비동기배열처리방법
- 홍대 카페 장쌤
- 고르드
- 잠실새내
- 홍대 예술
- promise메서드
- apollo react native
- 잠실새내 도그존
Archives
- Today
- Total
yehey's 공부 노트 \n ο(=•ω<=)ρ⌒☆
[CEOS - 1주차 미션] vanilla-todo 구현하기 본문
처음 작성했던 코드
파일 구성
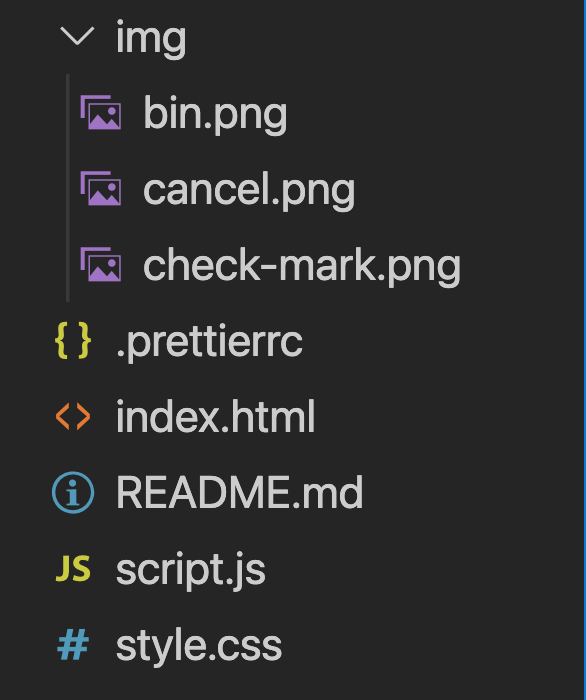
html 파일
<!DOCTYPE html>
<html lang="en">
  <head>
    <meta charset="UTF-8" />
    <meta name="viewport" content="width=device-width, initial-scale=1.0" />
    <title>Vanilla Todo</title>
    <link rel="stylesheet" href="style.css" />
  </head>
  <body>
    <div class="container">
      <h1>오늘의 할 일</h1>
      <ul class="todoListContainer">
      </ul>

      <h1>오늘 다 한 일</h1>
        <ul class="completeContainer">
        </ul>

      <form class="submitContainer">
        <input type="text" placeholder="새로운 할 일 추가" id="inputToDo" style="font-family: 'MapoFlowerIsland';" >
        <button type="submit" id="submitBtn">+</button>
      </form>
    </div>
  </body>
  <script src="script.js"></script>
</html>
CSS 파일
html,
body {
  margin: 0;
}
@font-face {
  font-family: 'Cafe24Dangdanghae';
  src: url('https://cdn.jsdelivr.net/gh/projectnoonnu/noonfonts_2001@1.2/Cafe24Dangdanghae.woff')
    format('woff');
  font-weight: normal;
  font-style: normal;
}
@font-face {
  font-family: 'MapoFlowerIsland';
  src: url('https://cdn.jsdelivr.net/gh/projectnoonnu/noonfonts_2001@1.1/MapoFlowerIslandA.woff')
    format('woff');
  font-weight: normal;
  font-style: normal;
}
* {
  box-sizing: border-box;
  font-family: sans-serif;
}

body {
  width: 100vw;
  height: 100vh;

  /* Center Container */
  display: flex;
  align-items: center;
  justify-content: center;

  /* Coloring */
  background: #2ec1ac;
}

input,
button,
ul,
p {
  all: unset;
}
span {
  font-family: 'MapoFlowerIsland';
}

h1 {
  align-self: center;
  font-size: 150%;
  color: palevioletred;
  font-family: 'MapoFlowerIsland';
}
.todoList,
.completeList {
  padding-left: 8%;
  margin-top: 2%;
  font-size: 100%;
}
.completeList {
  color: lightgrey;
  text-decoration: line-through;
}
.container {
  width: 350px;
  height: 600px;

  display: flex;
  flex-direction: column;
  align-items: stretch;

  box-shadow: 0 0 25px rgba(0, 0, 0, 0.25);
  background: white;
}
.todoListContainer,
.completeContainer {
  width: 100%;
  height: 50%;
  display: flex;
  flex-direction: column;
  align-items: stretch;
  list-style: none;
  overflow-y: scroll;
}

.submitContainer {
  width: 350px;
  height: 50px;
  display: flex;
  flex-direction: row;
  align-items: stretch;
  border-top: 1px solid gray;
}
#submitBtn {
  width: 10.7%;
  height: 70%;
  border-radius: 50%;
  background-color: palevioletred;
  text-align: center;
  color: honeydew;
  margin: 2.09%;
}
#inputToDo {
  width: 90%;
  margin-left: 3%;
  margin-top: 2%;
  margin-bottom: 2%;
  margin-right: 0px;
  border: 0.5px lightgray solid;
  text-align: center;
  border-radius: 30px;
}

/*의문 ???? 3개 클래스를 따로 한거를 위에 두면 그림이 보이는데 아래 두면 안보임,,, 왜지ㅠㅜ*/
.deleteimg {
  background: url('./img/bin.png') no-repeat;
}
.completeimg {
  background: url('./img/check-mark.png') no-repeat;
}
.cancelimg {
  background: url('./img/cancel.png') no-repeat;
}
.deleteimg,
.completeimg,
.cancelimg {
  margin: 1%;
  margin-top: 0%;
  float: right;
  width: 6.5%;
  height: 100%;
  border: none;
  cursor: pointer;
  background-size: cover;
  background-position-x: center;
  opacity: 10%;
}
.deleteimg {
  margin-right: 8%;
}
.deleteimg:hover,
.completeimg:hover,
.cancelimg:hover {
  opacity: 70%;
}
JS 파일
//yehey 하이
const todoForm = document.querySelector(".submitContainer"),
    todoInput = todoForm.querySelector("input"),
    todoList = document.querySelector(".todoListContainer"),
    completeList = document.querySelector(".completeContainer");

const TODOS_LS = "todos";
let todos =[];    //여러개의 할 일들을 담을 배열
const COM_LS = 'done';
let done=[];

function loadToDos(){
    const localTodo = localStorage.getItem(TODOS_LS);
    const localDone = localStorage.getItem(COM_LS);
    if(localTodo!==null){
        //로컬스토리지에서 데이터 가져오기 String -> Obj 변환 필요
        const local = JSON.parse(localTodo);
        local.forEach(function(toDo){ addToDo(toDo.text);})
    }
    if(localDone!==null){
        //로컬스토리지에서 데이터 가져오기 String -> Obj 변환 필요
        const local = JSON.parse(localDone);
        local.forEach(function(toDo){ addComplete(toDo.text);})
    }
}
//text 기반으로 todolist에 할 일 추가
function addToDo(text){
    const todo = document.createElement("li");
    const delBtn = document.createElement("button");
    //delBtn.innerText = "";
    delBtn.classList.add("deleteimg");
    const completeBtn = document.createElement("button");
    completeBtn.classList.add("completeimg");
    const span = document.createElement("span");
    span.innerText = text;
    const todoId = todos.length+1;

    delBtn.addEventListener("click", deleteTodo);
    completeBtn.addEventListener("click", completeTodo);

    todo.appendChild(span);
    todo.appendChild(delBtn);
    todo.appendChild(completeBtn);
    todo.id=todoId;
    todo.classList.add("todoList");

    todoList.appendChild(todo);

    const todoObj = {
        text : text,
        id: todoId,
    };

    todos.push(todoObj);
    saveToLocal('todo');
}

//todo 리스트에서 할일 끝내면 complete 리스트에 할일을 text 기반으로 추가
function addComplete(text){
    const completeTodo = document.createElement("li");
    const cancelBtn = document.createElement("button");
    const delBtn = document.createElement("button");
    const span = document.createElement("span");

    cancelBtn.classList.add("cancelimg");
    delBtn.classList.add("deleteimg");

    cancelBtn.addEventListener("click", deleteCompleteTodo);  //끝낸 일에서 다시 할 일로 올림
    delBtn.addEventListener("click", deleteCompleteTodo);   //끝낸 일 삭제
    span.innerText = text;
    const completeID = done.length+1;

    completeTodo.appendChild(delBtn);
    completeTodo.appendChild(cancelBtn);
    completeTodo.appendChild(span);
    completeTodo.classList.add("completeList");
    completeTodo.id = completeID;               //이걸 추가해야 나중에 event처리할 때 id 를 이용해서 구분이 가능..! 오류 잡으려고 30분 넘게 걸렸으니까 제발,,,까먹지 말아야지...

    completeList.appendChild(completeTodo);

    const doneObj = {
        text: text,
        id : completeID,
    };
    done.push(doneObj);
    saveToLocal('done');
}

//todolist 에서 할일 삭제, 이벤트 기반
function deleteTodo(event){
    const deleteNode =  event.target.parentNode; //버튼의 부모노드를 반환해줌, 여기서 id를 찾을 수 있음!
    console.dir(deleteNode)
    todoList.removeChild(deleteNode);
    const cleanTodo = todos.filter(function(toDo){
        return toDo.id !== parseInt(deleteNode.id);       //deleteNode.id 의 값은 string, 따라서 형변환 필요
    });   //filter는 배열의 모든 아이템을 통해 함수를 실행, 함수 값이 true 인 아이템들로만 새로운 배열을 생성

    todos=cleanTodo;
    saveToLocal('todo');          //실수 했던 부분, 로컬스토리지에 저장하려면 이걸 꼭 썼어야 함,,
}

//할일 끝내면 todolist에서 할일 삭제, completelist에 할일 추가, 이벤트 기반
function completeTodo(event){
    const completeNode = event.target.parentNode;
    deleteTodo(event);
    addComplete(completeNode.textContent);    //completeNode.outerText 이거를 대신 써도 되는듯
}

//completelist 의 할 일 삭제
function deleteCompleteTodo(event){
    const delCompleteNode = event.target.parentNode;
    console.dir(delCompleteNode)
    if (event.target.className==="cancelimg"){   //삭제가 아니라 할 일로 넘겨야하는 경우
        addToDo(delCompleteNode.textContent);
    }
    completeList.removeChild(delCompleteNode);
    const cleanDone = done.filter(function(toDo){
        return toDo.id !== parseInt(delCompleteNode.id);       //deleteNode.id 의 값은 string, 따라서 형변환 필요
    });

    done = cleanDone;
    saveToLocal('done');
}

//로컬스토리지에 할 일 저장 (todolist만)
function saveToLocal(status){
    if (status === 'todo'){
        localStorage.setItem(TODOS_LS,JSON.stringify(todos));    //js 객체를 String으로 바꿔서 로컬 스토리지에 저장
    }else{
        localStorage.setItem(COM_LS,JSON.stringify(done));
    }
}

//할일 입력하면 실행되는 이벤트
function handleSubmit(event){
    event.preventDefault();
    const currentValue = todoInput.value;
    if (currentValue!==''){
        addToDo(currentValue);
    }
    todoInput.value="";
}

//기본으로 실행될 함수, 할일 입력받기 대기
function init(){
    loadToDos();
    todoForm.addEventListener("submit",handleSubmit);
}


//실행..?
init();
더보기
1주차 과제 느낀점
시작할 때는 자바스크립트가 제일 겁이 났는데, 막상 해보니까 자바스크립트보다 CSS가 더 힘들었던 것 같아요. 처음에는 px로 CSS를 구성해봤는데 화면 확대하고 축소할 때 이것저것 다 깨져서 제 멘탈도 같이 깨졌습니다. 그래서 %로 바꾸려고 노력은 해봤는데 생각만큼 잘 안됐던 것 같아요ㅠ 사실 아직 %가 무슨 기준인지 잘 모르겠어요. 더 많이 공부 해야겠어요. 디자인 예쁘게 해보고 싶었는데... 미션하느라 벅차서 디자인은 건드리지도 못했어요. 그리고 저 제시 화면중에서 hover? 명칭이 이게 맞는지는 잘 모르겠는데 text에 마우스 커서 가져다 왔을때만 버튼이 보이게하는 방법을 찾지...못했습니다.ㅠ 방법 아신다면 알려주세요! 꼭 고쳐보고 싶어요!
++ 이상하게 사파리로 html파일을 열면 버튼이 안보이더라구요 그래서 저는 웨일이나 크롬으로 열었습니다.. 참고해주세요!
받은 코드 리뷰
- 변수 이름, 함수명 등은 줄여서 표현하지 않고 되도록 읽었을 때 이해가 바로 가도록 작성할 것!
함수는 동사로, 변수는 명사로 html 클래스 이름은 -을 사용해서!
코드 작성자가 임의로 약자를 사용해서 이름을 짓는 경우 해당 코드를 읽는 사람의 가독성이 떨어지기 때문에 코드만 읽어도 어떤 기능을 하고 어떤 값을 담았는지 알 수 있게 하는 것이 좋음! - 의존성 낮추기 (정해진 인터페이스 사용하기)
- 자바스크립트 ES6 문법을 활용하기
- 고유 ID 값을 배열 개수가 아닌 생성 시간으로 설정하기 (값이 중복될 가능성이 거의 없어짐, Date.now(): 유닉스 시간)
- 로컬 스토리지에서 todo 와 done 두가지 저장소를 사용했는데, 하나의 객체로 묶고 관리하기 (상태를 나타내는 bool을 추가해서 구현)
- forEach 함수는 비동기, 동기처리(? 맞게 해석했는지는 잘 모르겠음) -> for ... of 함수를 사용하자 (for-loop)
일단 코드리뷰 정리해봤을 때 이정도인 것 같다. 아마도? 물론 더 고칠건 수두룩 빽빽하겠지만..그래서 위의 코드리뷰를 바탕으로 js 파일을 완전 새롭게 만들것임!!
그전에 공부해야할 것은 의존성을 어떻게 낮춰야할지 더 찾아봐야겠고, ES6 문법도 알아보고, 동기, 비동기가 무엇인지도 공부해야겠다.
다음주 과제가 있어서 더 깊게 파고 싶어도 파지 못할 수도 있지만,, 그래도 받은 리뷰는 최대한 고치고 싶다.
다른 팀원들 코드에서 배운 것
- 나는 버튼 이미지를 CSS에서 class로 주었지만 js 에서 이미지를 줄 수 있었다. 이 방법으로 고쳐볼 예정
- DOM을 가져올 때, querySelector 외에도 getElementById를 이용해볼 것
이제 열심히 고쳐보자,,,,,할 수 있다,,,👏
'개발 > 프로젝트' 카테고리의 다른 글
| [CEOS - 3주차 미션] react-messenger 만들기 (2) | 2021.08.29 |
|---|---|
| [CEOS - 2주차 미션] react-messenger 만들기 (0) | 2021.04.11 |
| [ios] Locord 개발일지 - 서버에 이미지, 데이터 POST (0) | 2021.03.03 |
| [ios] Locord 개발일지 - naver 지도 불러오기 및 수정 (0) | 2021.02.16 |
| [ios] Locord 개발일지 - emojiPicker 팝업 (0) | 2021.02.13 |
'개발/프로젝트' Related Articles
more

Comments